What is an operating system?
An operating system is the most important software that runs on a computer. It manages the computer's memory, processes, and all of its software and hardware. It also allows you to communicate with the computer without knowing how to speak the computer's language. Without an operating system, a computer is useless.
The operating system's job
Your computer's operating system (OS) manages all of the software and hardware on the computer. Most of the time, there are many different computer programs running at the same time, and they all need to access your computer's central processing unit (CPU), memory, and storage. The operating system coordinates all of this to make sure each program gets what it needs.Types of operating systems
Operating systems usually come preloaded on any computer you buy. Most people use the operating system that comes with their computer, but it's possible to upgrade or even change operating systems.
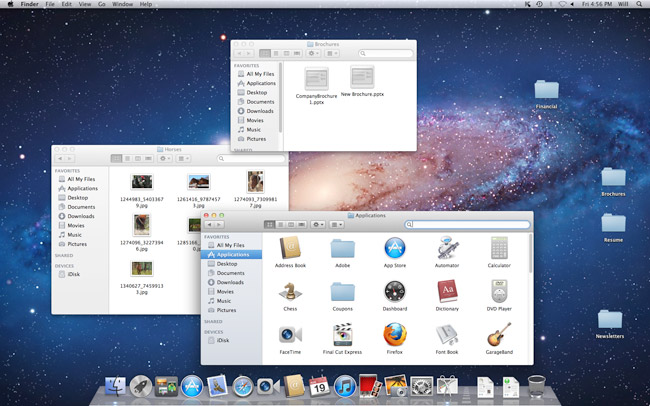
The three most common operating systems for personal computers are Microsoft Windows, Apple Mac OS X, and Linux.
Each operating system's GUI has a different look and feel, so if you switch to a different operating system it may seem unfamiliar at first. However, modern operating systems are designed to be easy to use, and most of the basic principles are the same.
Microsoft Windows
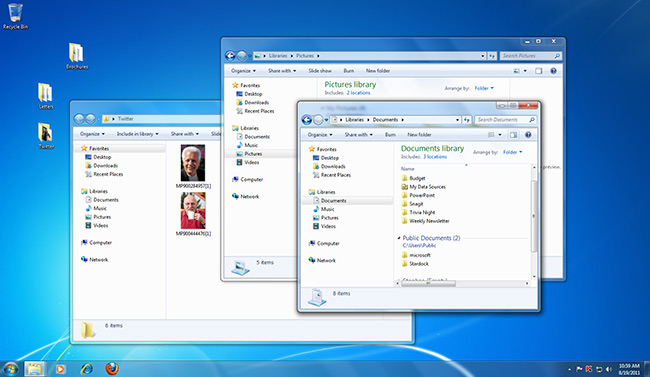
Microsoft created the Windows operating system in the mid-1980s. Over the years, there have been many different versions of Windows, but the most recent ones are Windows 8 (released in 2012), Windows 7 (2009), and Windows Vista (2007). Windows comes preloaded on most new PCs, which helps to make it the most popular operating system in the world.The Windows 7 Desktop
When your computer starts for the first time, what you see is called the Desktop. It will look something like this:
The Desktop is split into two areas. The strip at the
bottom, with the clock to the right and the round Start button to the
left, is called the Taskbar. We explore this area in a different section
(the Taskbar). But here's a closer look at it:
The Taskbar above is from Windows 7. Windows Vista users
will see the round Start button on the left, but will have smaller icon
just to the right of it. You'll still have the clock on the right hand
side, though.
The rest of the Desktop is the space where all your programmes
will appear when you start them up. This space contains a default background
wallpaper, but it can also contain shortcuts to programmes, documents
and folder.
You can change the default background wallpaper, and we'll
do that next.
Desktop Backgrounds and Wallpapers
Windows 7 lets you easily change the image you see on your desktop. This is called the Desktop background, or Desktop wallpaper.
To chage your Desktop Wallpaper, click anywhere on the
desktop with your right mouse button, and you should see a menu appear:

One of the items on the menu allows you to personalize
your desktop screen. So click on Personalize with your left mouse
button to see a window appear. This one:

The main area in the screen above let's you select a Theme
from the available list. A Theme sets not only your desktop background,
but also a screensaver, the colour of windows, sounds, and mouse pointers.
And all that with just one click!
If you just want to set background wallpaper, however,
select Desktop Background from the bottom left. The default is
called Harmony.
When you click on Desktop Background you should see something
like the following:

You can select a picture from the ones available by clicking
on it with your left mouse button. Your desktop background will then
change. To make the change permanent, click the Save Changes button
at the bottom.
If you have a picture of your own, you can use this instead
of the ones built-in to Windows 7. To set your own picture, click the
dropdown list at the top, where it says Windows Desktop Background:

Here, we have moved to the Pictures Library folder to
see what images are available. Another option is to click the Browse
button. When you do, you'll see a dialogue box appear:

Browse to the folder where your images are and click OK.
We have a folder called York with some images in it, so we've selected
that one.
When you click OK, you'll see the images in that folder:

Select the image you want to appear on your desktop from
those available. If you would like a slideshow of all the images in
the folder, then click the Select All button. If you click the Select
All button then the dropdown list at the bottom becomes available:

This list lets you choose how often each image in the
slideshow is displayed before moving on to the next one. The default
is 10 seconds.
Another area to play around with is the Picture Position.
Click the black arrow to see a dropdown list:

Select each one in turn and watch what happens.
When you are happy with your choices, click Save Changes.
You will then be taken back to the first screen:

Windows Colour
Another interesting area to play around is the Windows
Colour area, circled in red in the image above. Click the link to see
the following screen:

Things like the start menu, the taskbar, and the areas
around programmes can all have the same colour scheme. The default is
called Sky. Click one of the other colours above and watch what happens
to your Taskbar at the bottom. Click the round Start button on the left
of the Taskbar and you'll see that its colour too has changed. Uncheck
the box that says "Enable transparency" and you'll see a deeper
colour for the one you have chosen.
If you don't like the colours available, click the arrow
to the left of Show Color Mixer. Then play around with the controls.
To get back to the default colours, just click the colour square in
the top left of the screen, which is Sky.The Windows 7 Taskbar
The taskbar is the thin strip that runs across the bottom of your screen. It is split into a number of different areas: a round Start button, Quick Launch icons, a notification area, and a clock. All other areas are the Taskbar itself. The image below shows where the different areas are:
The Start button is explained in a section all of its
own, as it's probably the most important area of the Taskbar. Click
here to go the Start button page:
There is one more area on the Taskbar, and it's easily
overlooked - the Show Desktop button. In the images above, you can just
see a narrow rectangle to the right of the clock:

Click this button to minimize all open programmes and
reveal the desktop.
Quick Launch Icons
In the main image above, take a look at the three big
icons to the right of the round Start button. These are quick launch
icons, meaning you can quickly launch any of the programmes you see
there. When you hold your mouse over one of the icons, you'll see a
small popup rectangle that shows you a preview of any open windows.
In the image below, we're holding our mouse over the Firefox icon. (Firefox
is a web browser used to display internet pages. It's Internet Explorer's
main competitor.)
In Windows Vista, however, the icons will be smaller,
and there's no popup.

Click on the preview window and it opens the programme
up in full screen.
There are several ways to add new programmes to the Quick
Launch area, but Windows 7 makes it a lot easier. Open up a programme
using the Start menu. When it's open, use the right mouse button to
click its icon in the Taskbar. A new menu appears:

In the image above, we have Microsoft Excel open. Right-clicking
its icon in the Taskbar gave us the above menu. Once "Pin this
program to the taskbar" is clicked with the left mouse button,
it will appear permanently in the Quick Launch arrear. If you want to
get rid of any Quick Launch programmes, the item on the menu will say
"Unpin this program from the taskbar" when you right-click.
You can also use the Start menu to add programmes to the
Quick Launch area. Again, right-click the programme you want to add.
From the menu, select "Pin to Taskbar". In the image below,
we're adding Notepad as a Quick Launch icon:

The Date and Time in Windows 7
The default clock shows you the date as well as the time:
As you can see, as well as a clock you get a calendar.
Click the arrows to display new months:

To change the settings for the clock, the date, and the
time, click on "Change date and time settings". You should
see the following dialogue box appear:

If your clock is showing the wrong time, or the wrong
date, click the button "Change date and time ..." When you
do, you'll see the following dialogue box appear:

To change the date, click the black left and right arrows
to move to the correct month. Then select the date you want. To change
the time, click the up and down arrows below the clock. Click OK when
the date and time are correct.
If you want to play around with the way Windows 7 displays
the Date and Time, click on "Change calendar settings" then
play around with the settings. You may need to restart before the changes
take effect.
If you want more than one time zone to appear, click the"
Additional Clocks" tab at the top of the Date and Time dialogue
box:

Click the box to the left of "Show this clock"
and the drop down list will become available. Select a time zone from
the list. Type a name for you clock in the box below the heading "Enter
display name". Then click OK. Click OK again to get rid of the
Date and Time dialogue box. Now click the clock area again in the bottom
right of the taskbar. You should see your new clock appear:

In the next lesson, we'll have a look at adding toolbars
to the Windows 7 taskbar.
Toolbars in Windows 7
You can add Toolbars to your taskbar area. A toolbar is a list of shortcuts to favourite areas of your computers. Right click the Taskbar to see the following menu:
Select Toolbars to see the built-in Windows 7 ones:

As you can see, there are entries for Address, Links,
PowerDVD 8, Desktop, and New toolbar. (Unless you have the PowerDVD
programme on your computer, you won't see this one.)
To see what they do, click the first one, Address. You
should see the following appear in your Taskbar:
This is similar to the Search bar on the Start menu. You
can type a web site address in the text box (but see the warning below,
before you do). When you click the blue double arrows it will launch
your browser and navigate to the website you typed. Or just navigate
to areas on your computer. Click the black down arrow to see some shortcuts:

Click on a shortcut to launch that particular programme
or dialogue box. The entry for "notepad.exe" in the image
above is there because we typed it in the Address bar. When we pressed
the enter key on the keyboard, this programme was then launched. If
you know the name of a programme on your computer, type it in the address
bar to open it up.
WARNING: Deleting Items From the Address Bar
When you type a web address in the Address Bar above,
it will add it there on a permanent basis. If you were to close down
the computer and opening it again, the address will still be there.
This could be quite problematic, if the web address is a sensitive one.
Sadly, Microsoft haven't provided an easy way to delete
single URLs from the Address bar above. Doing so means opening and editing
the Windows registry, which is beyond the scope of this artcile.
However, you can clear all the entries in the Address bar quite easily.Click the Start button. From the Start menu, select Computer from the list on the right hand side. You should see an Explorer window open. The Address bar is at the top, and will say Computer:


Select Delete History. It should clear the items in your Address bar. Not only the Address bar at the top, but also the one in the Toolbar at the bottom of the screen.
The Links Toolbar Item
The Links item on the menu refers to the Favourites Bar
folder that appears in Internet Explorer. These are shortcuts to websites
you've added. The Links toolbar looks like this, when you add it to
the Taskbar:
Click the double white arrows to see a menu appear:

But you can also right-click the word "Links".
A new menu appears:

Select "Open Folder" to see the shortcuts:

You can add your own shortcut items to the favourites
bar folder. In the image below, we've right-clicked on the Documents
folder under Libraries, and selected Copy:

We've then right-clicked inside of the favourites bar
folder and selected Paste Shortcut:

The Documents folder will then appear as a shortcut on
the Links bars:

Creating New Toolbars
At the bottom of the toolbar menu there is an item for
"New toolbar". This allows you to create a toolbar of your
very own:

When you click on "New toolbar", you'll see
an Explorer window open. Select a folder to add to your new toolbar.
In the image below, we've selected the Pictures folder from the list
on the left:

The Folder text box at the bottom then says "Pictures".
Click the Select Folder button. Your chosen folder will appear
on your Taskbar at the bottom of your screen:

You now have a handy shortcut to any images that you save
in the Pictures folder.
In the next lesson, we'll take a look at the Start button.
No comments:
Post a Comment