Displaying the Word Options
There are lots of hidden settings you can change in Microsoft Word. To see them in Word 2007, click the round Office button in the top left. From the menu, click the Word Options button at the bottom: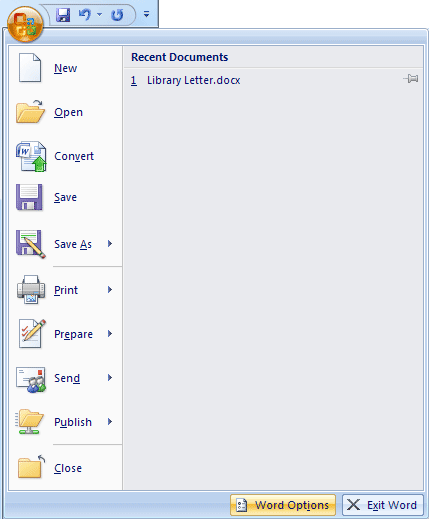
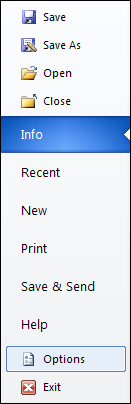
In Word 2010, click the File tab. From then menu
on the left, select Options. (Rather confusingly it looks like
the Info tab is selected. This is Micrsofot's fault, not ours!):
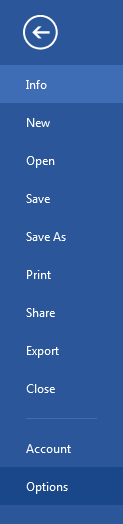
In Word 2013, the File menu looks like this:
When you click on Options or Word Options
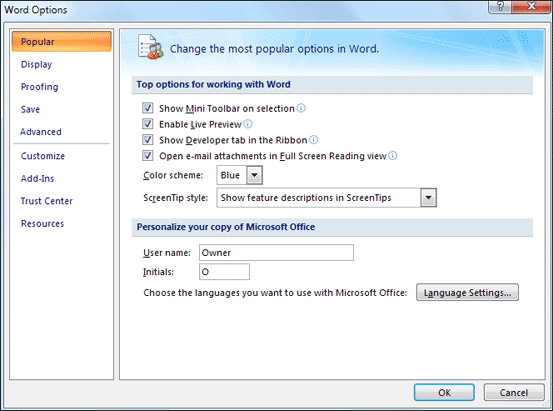
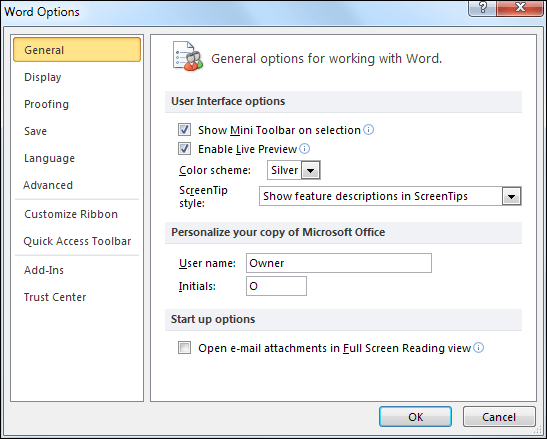
you'll see a dialogue box appear. This one in Word 2007:
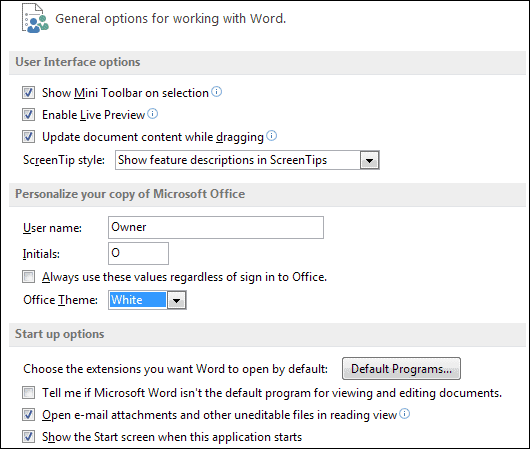
And this one in Word 2010:
The Word 2013 dialogue box has the same options on the
left as the one from 2010. On the right, however, there are more options
to choose from:
The list on the left leads to more options. The first
item is the Popular tab (General in Word 2010 and 2013).
It shows you the "Top options for working with Word". One
you might want to change is to get rid of the mini toolbar. The mini
toolbar appears every time you select some text. It's this one:
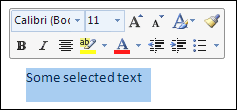
If it's annoying you, uncheck the box on the Popular or
General tab that says "Show Mini Toolbar on selection". When
you click OK on the Word Options dialogue box the mini toolbar won't
appear anymore when you select some text.
If you don't do any programming with Microsoft Word then you can also
uncheck the box "Show Developer tab in the Ribbon". If you've
worked with Macros before then check this box, because you'll need it.
(If you need the developer tab in Word 2010 and Word 2013, click on
Customize Ribbon. Under Choose commands From, select Custom
Tabs and Groups. From the Main tabs check boxes, select Developer.)The default colour for Word is blue in version 2007 and Silver in Word 2010. Click the Color scheme box to see more (click Office Theme in Word 2013.). Sadly, there are only two others in Word 2007 and 2010, Silver and Black. Word 2013 has three: white Light Grey and Dark Grey.
Changing the Language Settings
If you want to work in a language other than the default
one, click the Language Settings button on the Popular
tab, if you have Word 2007:

You'll then see this dialogue box:

Select a language from the top list on the left, then
click the Add button. Or select a language on the top right list
and click Remove, if you no longer want it. You may also need
to select the language from the list at the bottom, under Primary
editing language. There is, however, limited support for some languages.

Click on the dropdown box that says "Add additional
editing languages" to see a list of languages. Select the one you
want from the list, then click the Add button. In the image below,
we've added Welsh to our Editing languages. Note that there is also
a button to set this one as the Default language:

Look under the Proofing (Spelling, Grammar … ), however,
and you'll see "Not Installed". Click this link to go to Microsoft's
website where you can choose a language pack to install. (Note: 2007
language packs won't work with the 2010 and 2013 version.)
Proofing Options
There are quite a few options on the Proofing tab. Click it on the left of the Word Options dialogue box to see the following list of things you can set: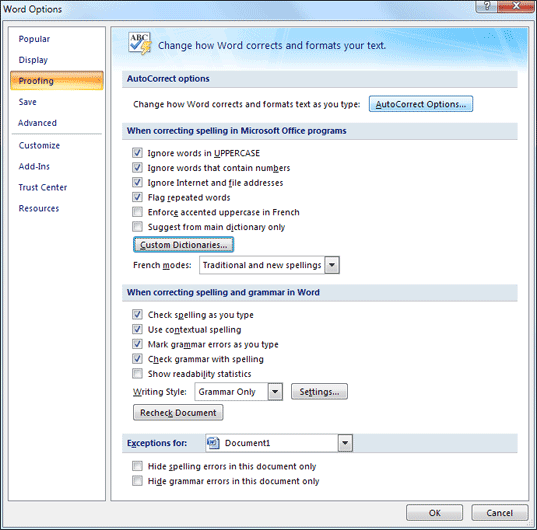
The button at the top is for AutoCorrect Options. You've
seen this before when we set up a shortcut for a name. (We wanted Ken
Carney to appear in place of the letters KC.)
If you get tired of seeing green underlines everywhere on your page,
you can uncheck the box for "Check grammar errors as you type".
If you don't want Word to check your spelling as you type, uncheck its
box. You can still check for these errors, though. Just click the Spelling
& Grammar item on the Review tab at the top of Word.
No comments:
Post a Comment