Add a Contents Page to your Booklet
We'll insert a contents page on page 2 of our document. So click onto page 2. Type the word "Contents" at the top, and centre it. Change the font and font size. Again, hit the enter key a few times to give yourself some space. Your page will then look like this:
In the image above, we've hit the Enter key 8 times.

The bottom of the dropdown list is different in Word 2013.
It looks like this:

As you can see, there are a few built-in styles you can
use. But click the menu item at the bottom that says "Insert Table
of Contents". (Word 2013 users need to click "Custom Table
of Contents".) The following dialogue box should then appear:

The Heading 1, Heading 2 and Heading 3 refer to in-built
styles. We didn't use any of these styles, but created our own. That
means we need click the Options button at the bottom.
When you click the Options button, you'll see this dialogue box:
Notice there is an area called TOC level. TOC stands
for Table of Contents, and the levels are for different sub headings.
We don't have any sub headings, just the story titles. But the default
settings are for Heading 1 to be TOC level 1, Heading 2 to be TOC level
2, and Heading 3 to be TOC level 3. We need to delete these numbers.
So click inside the text box with the 1 in it. Delete the 1 by hitting
the backspace key on your keyboard. Do the same for the 2 and the 3.
Now click inside of the Fairy_Tales_Title text box, which is our style.
Type the number 1 and your dialogue box will look like this:
If we did have sub heading, we could have set them all
to the Heading 2 Style. We would have then typed a 2 in the Heading
2 text box. This would get you a table of contents in this style:
Main Heading Level 1Sub Heading Level 2
Sub Heading Level 2
Sub Heading Level 2
Main Heading Level 1
Sub Heading Level 2
Sub Heading Level 2
Sub Heading Level 2
But click OK when your dialogue box looks like ours above. You will be returned to the Table of Contents dialogue box:

There are a few areas to take note of here. "Show
page numbers" means the page that the story starts on. These are
shown on the right hand side because we have ticked the box below it.
A Tab leader is the area between the heading and the page number. The
default is dots. You can change this from the Tab leader dropdown box.The Formats dropdown box contains built-in content styles. Click the arrow to see the following:

We have selected Classic. The Print Preview at
the top will then show this:

Click OK after selecting Classic and the dialogue box
will disappear. Your contents page will then look like this:

If you wanted to jump to, say, the Puss in Boots story,
hold down the CTRL key on your keyboard. Keep it held down and click
with your left mouse button on that story title. You will jump to page
15 in your document. To get back either scroll up, or hold down the
CTRL and Home key combination.
Another way to jump to different parts of your document is from the
Home > Editing panel. Click the Find option, and then
the Go To item:
You'll then see the following dialogue box:

Type a page number in the text box and click the Go To button. (The button will say Next before you type anything into the text box.) Or you could select the Section item on the list and type a section number text box.
Working with Sections
The reason why we set up sections in our Word document
is so that each section can be formatted separately. We want one header
on the even pages and a different header on the odd pages. We want to
put the words "Fairy Tales" in one header and the name of
the story in the other. However, we don't want anything at all on the
first page of each story, where the title is. To do that we need a few
more section breaks.
To set up a Continuous Section Break, move your cursor
to the bottom of page 2 of your Cendrillon story (page 1 will have the
Cendrillon title at the top). Position your cursor on the last line
of this page, as in the image below:

Make sure your cursor can't go any further down this page.
Ours is at the end of the line. If we were to hit the down arrow on
our keyboard the cursor would move to the next page.
Click on the Page Layout tab at the top of Word. From the Page
Setup panel, click the Breaks item again. From the menu,
select Continuous under Section Breaks:
It will appear as though nothing has happened. But check
the Section area in your Status Bar in the bottom left of Word. The
page with the Cendrillon title should be Section 3. When you click anywhere
on the second page of your Cendrillon story this should change to Section
4.
Now do the same thing for the next two stories in your document:-
Move your cursor to the bottom of page 2 of the story
-
Insert a new Continuous Section break
With the Sections breaks all set up, we can now insert the headers.
Headers and Section Breaks
Inserting different headers into different section can be a bit tricky. Before we begin then, don't forget the Undo feature in Microsoft Word. The Undo icon is at the very top of Word, on the Quick Access Toolbar, which is just to the right of the round Office button in Word 2007: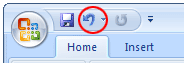
There's no Office button in Word 2010 and Word 2013, but
the Undo icon is still on the Quick Access Toolbar:
In both versions, you can click the little arrow to reveal
a dropdown menu. This allows you to undo several steps at once:

With that in mind, let's add some headers to our booklet.

When you click on Edit Header, you'll jump to the Header
section on the cover page:

Notice, too, that a new tab appears at the top of Word,
the Design tab. Locate the Navigation panel, and click
Next Section (just Next and Previous in Word 2010
and 2013):

When you click Next Section, you cursor will jump to the
header on the second page, which is Section 2:

Again, click Next Section on the Navigation panel, as
we don't want a header on the contents page. Your cursor will jump to
page 3, which is Section 3:

Notice that it says "Same as Previous" on the
right of the header. This means the same formatting as the header in
the previous section. We don't want this. So have a look at the Navigation
panel and you'll see that "Link to Previous" is lit up:

Click this button to deselect.
We want different headers on the odd and even pages, so locate the
Options panel (to the right of the Navigation panel). Select
the item "Different Odd & Even Pages": (You may need to
deselct Link to Previous agian, if it switches itself on.)
The Header on page 3 will then look like this:

We don't want any header on pages that have a title, so
click the Next Section item on the Navigation panel. This will jump
you to page 4 of your document:

Again, Same as Previous is showing on the right of the
header. We want a new header here, so deselect Link to Previous on the
Navigation panel. (It's important to do this before typing anything
into the header, otherwise you'll have text in headers where you don't
want it.)
Now type the words Fairy Tales into the header:
Click the Next Section button in the Navigation panel to jump to the Odd Page Header:

We'll right-align the headers in the odd page section. To do that, locate the Position panel:


Click the Next Section button on the Navigation panel to jump to your second story, Little Red Riding Hood:
The problem here is that it has the title Cendrillon in the header. To solve the problem, deselect Link to Previous in the Navigation panel. Now delete the text Cendrillon.
Again, we don't want any header on this page because it is one with a story title. So click the Next Section button. Your cursor will be flashing at the start of Fairy Tales on the next page. This is OK the way it is, so click Next Section again.
Deselect Link to Previous again. Now repeat the process for right-alignment, and then type Little Red Riding Hood. Your header will then look like this:

Click Next Section twice and then, again, deselect Link to Previous. Right-align, and type Puss in Boots.
Click Next Section and your cursor should be flashing in the header where you have your The Ant and Grasshopper title. It will say "Fairy Tales". We don't want this, so deselect Link to Previous. Now delete the text.
Click the Next Section button again, and your cursor will be flashing in the header where you have your The Crow and Fox title. Deselect Link to Previous and delete the text Puss in Boots.
Congratulations - you're done!
Click the Close button to return to normal:


OK, all that was a bit tricky, so close Print Preview and we'll move on. Before we do so, it must be noted that if you were printing this document you'd want to print on both sides of the paper. If you did that, then the contents page would be printed on the back of the cover page. To solve this, you can insert a blank page after the cover page by clicking on the Page Layout tab. Then select Breaks > Page Break > Page from the Page Setup panel.
No comments:
Post a Comment